Checklist for Perfect Trade Entry and Exit
A printable trading checklist covering all four phases — pre-trade, entry criteria, exit, post-trade review — with copy-paste blocks for forex, gold and crypto.
By Lenka Rož Schánová · Operations & Risk, For Traders
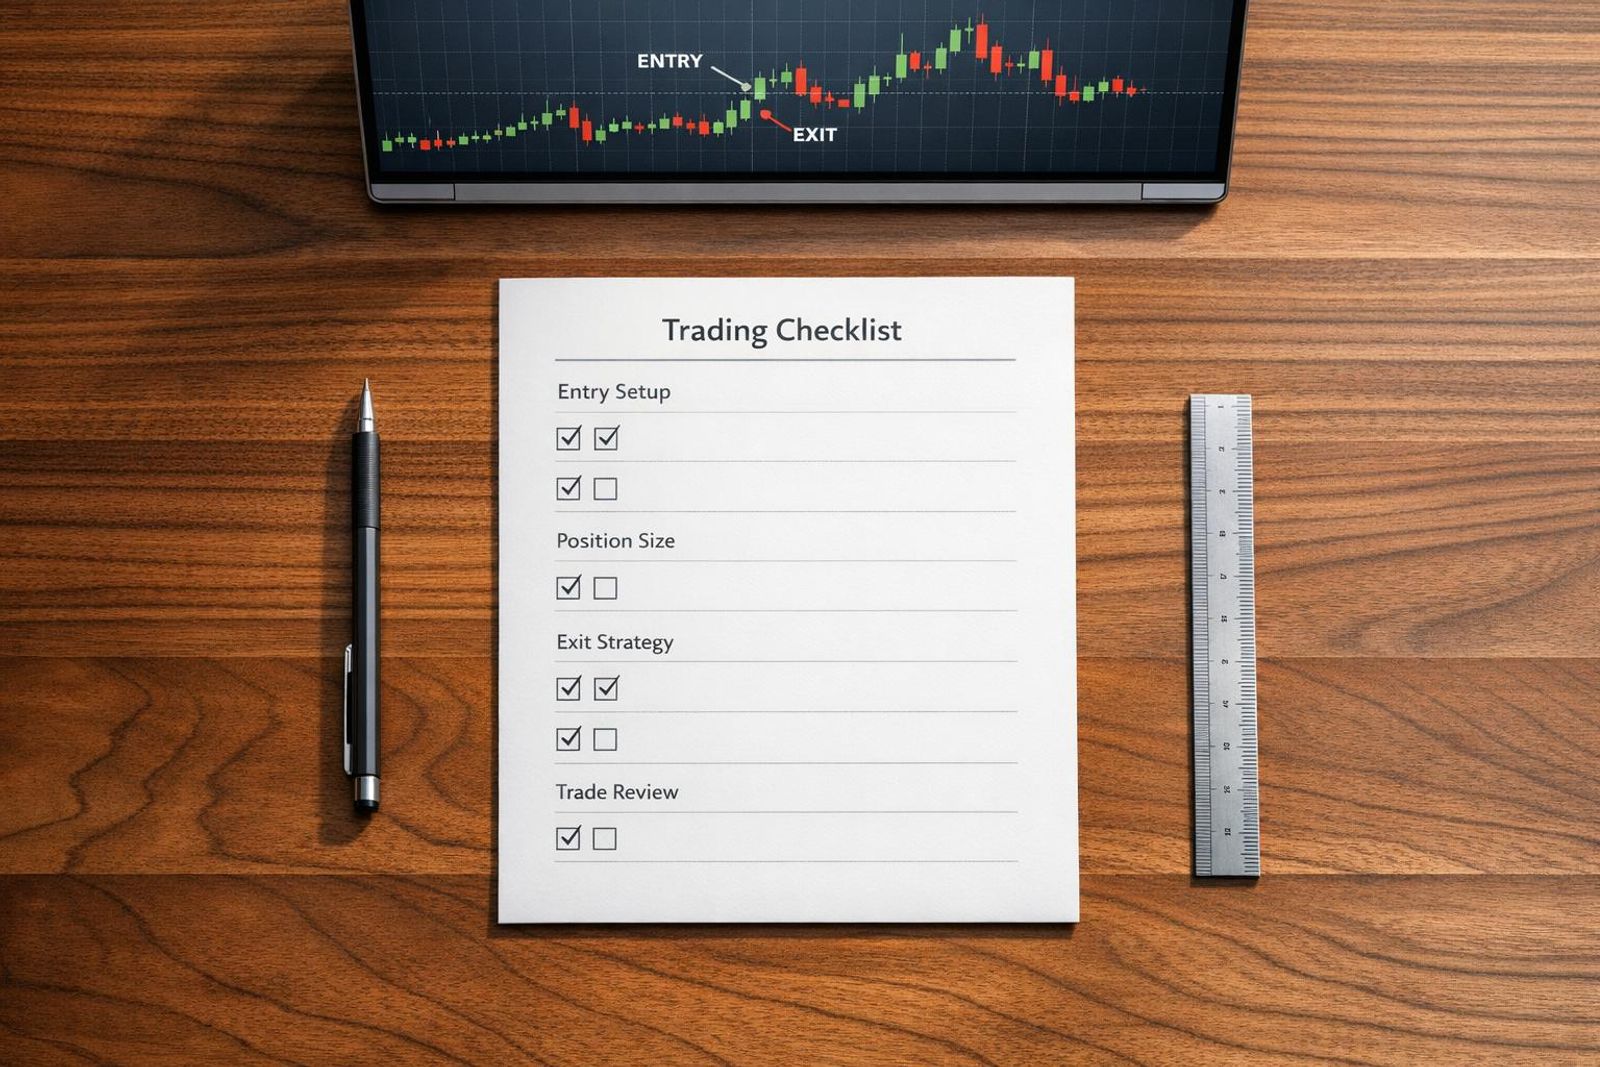
A trading checklist is a fixed set of pass/fail conditions you run in the same order on every trade, across four phases: pre-trade preparation, entry criteria, exit management, and post-trade review. Run properly it takes under 90 seconds, and it enforces the same non-negotiables every time — 1–2% risk per trade, a minimum 2:1 R:R, and a 30-minute buffer around high-impact news.
Key takeaways
- Every trading checklist has four phases and they run in strict order: pre-trade preparation → entry criteria → exit management → post-trade review.
- Five numbers never move: 1–2% risk per trade, minimum 2:1 R:R, stop at 1.5× ATR beyond structure, 30-minute buffer either side of high-impact news, and volume above 150% of average on the trigger candle.
- Entry criteria are mechanical, not emotional — the CSTI model separates Condition, Setup, Trigger and Invalidation so you can say out loud what would prove you wrong before you click.
- There is no perfect entry, only a repeatable entry; chasing the exact turn costs more in missed trades than it saves in stop distance.
- Gold, indices and crypto futures need different checklist variants — session windows, gap risk and funding rates change what you check.
- A prop firm evaluation adds three items retail traders skip: daily loss limit headroom, max drawdown buffer, and firm-specific news-window restrictions.
Watch: related video
What a Trading Checklist Is — and the Four Phases
A trading checklist is a fixed set of pass/fail conditions you run, in the same order, on every single trade — before you enter, while you're in, and after you're out. Nothing subjective. No line item that invites a debate with yourself. It's binary: check or no check.
The four phases in order
- Pre-trade preparation — is the setup even eligible today (news buffer, session, correlation exposure)?
- Entry criteria — does the trigger match your rules exactly, with size and R:R pre-calculated?
- Exit management — is your stop, target, and trail logic defined before you're in the trade, not after?
- Post-trade review — did you log it, and does the outcome match the process, regardless of P&L?
The master checklist table (one screen, print it)
| Phase | What you check | Pass condition | Fail action |
|---|---|---|---|
| 1. Pre-trade | News window, session, correlation | No high-impact event within 30 min; session matches your edge | Skip the trade, no exceptions |
| 2. Entry | Trigger, risk %, R:R | Setup matches rules; risk ≤1–2%; R:R ≥2:1 | No entry |
| 3. Exit | Stop placement, target, trail rule | Stop and target defined pre-entry, not adjusted mid-trade | Close at pre-set stop, don't renegotiate |
| 4. Post-trade | Journal entry, process vs. outcome | Logged within 10 min; process followed regardless of win/loss | Flag for review, no trading until reviewed |
This table is the whole tool. Screenshot it, print it, tape it beside your monitor. A pre-trade checklist only works if it's faster to glance at than to ignore.
Why checklists beat discipline
Here's the part traders resist: a trader checklist isn't there to inform your decision. It's there to remove the decision entirely. A fail on any line is a no-trade — not a discussion, not a "just this once," not a judgment call you make while the candle is moving against you.
The reason this matters is behavioral, not strategic. Decision fatigue is real and measurable — your rule-following degrades late in a session after dozens of micro-decisions, which is exactly when a rules-based trading system should be doing the deciding instead of you. Overconfidence bias shows up right after two clean winners in a row, when you're most tempted to skip step one and "just take it." And boredom trades in dead London-lunch hours or thin overnight sessions almost always fail line one of the checklist — there was no real setup, just an itch to click.
A checklist for trading doesn't replace your edge. It sits on top of whatever strategy you already trade — trend, mean reversion, breakout — and enforces that you actually execute it the way you designed it, not the way you feel like executing it at 2am on the fourth coffee.
The Non-Negotiable Numbers (Memorise These Five)
Five numbers separate traders who survive an evaluation from traders who blow it in week one. Write them on a sticky note if you have to — but know these are floors, not targets, and if your firm's own rules are tighter (say, a 4% daily loss limit that caps you below 2% per trade), the firm's number always wins.
Risk per trade: 1–2%
The 1% risk rule exists because six losing trades in a row isn't a bad month, it's a Tuesday. Run the position sizing formula — account size × risk % ÷ stop distance in pips (or ticks) — before every entry, not after. Break this and push risk to 3% per trade, and that same normal six-loss streak that a 1% trader shrugs off turns into an 18% drawdown that fails most evaluation accounts outright.
Minimum R:R: 2:1
A 2:1 risk to reward ratio means you can be wrong 60% of the time and still grow the account. Drop to 1:1 and the math flips hard — you now need north of 55% hit rate just to cover spread and commission, and most discretionary traders don't have a 55% edge. They have a 45-50% edge with good R:R. Don't let a "sure thing" setup talk you into skipping this line.
Stop distance: 1.5× ATR beyond structure
This is the one traders get wrong constantly. Placing a stop exactly at the round number — 1.2000, 2650.00 — feels tidy, but that's precisely where resting liquidity sits, and it gets swept first before price does whatever it was going to do anyway. Correct ATR stop placement means measuring 1.5× the 14-period ATR beyond the actual structure (the swing low, the breakout candle's wick) — not beyond the psychological number. It costs a few extra pips of risk. It saves you from being stopped out one tick before your trade idea actually plays out.
News buffer: 30 minutes either side
No new entries 30 minutes before or after FOMC, NFP, or CPI releases — check the economic calendar every single morning, not just on Fed days. Spreads widen, slippage spikes, and your stop distance calculation becomes meaningless in a 40-pip whipsaw. Skip this rule once during a real NFP print and you'll understand why it's non-negotiable, not optional.
Volume confirmation: 150% of average
A breakout on light volume is a trap waiting to fade back into range. Require volume at 150% of the 20-period average before you treat a breakout as real — this is one of the simplest trading entry criteria to check and one of the most skipped, because by the time you've confirmed volume the FOMO is already screaming at you to just get in.
Five numbers, one line each to justify, one line each on what it costs to ignore. Tape them somewhere you'll see them before every session.
Phase 1: The Pre-Trade Checklist (Before You Open a Chart)
This is the routine you run once, before the session opens — not for every ticket you're about to fire. Seven items, done in order, before you even pull up a candle: session, calendar, structure, bias, loss limit, correlation, state. Skip the pre-trade checklist and you're trading reactive; run it and you're trading a plan you already committed to before price could talk you into something dumb.
Market conditions: session, calendar, volatility
Confirm which session you're trading and why it matters for the instrument in front of you. XAUUSD and NSDQ100 both wake up hardest during the London session open and the New York session overlap — the two-to-three hour window where London liquidity is still live and New York desks are stepping in. Trading FX majors at 3am New York time with London closed and Tokyo thin is a different game than trading the overlap; your stop distance and expected range should reflect that, not a generic ATR pulled from a random hour.
Next, scan the economic calendar for the day — FOMC statements, NFP, CPI prints. These aren't optional glances. A scheduled CPI release can double ATR in the ten minutes around the print, which is exactly why the entry checklist enforces a 30-minute buffer either side of high-impact news. Mark the times now, before you're staring at a chart mid-spike wondering why your fill slipped four pips.
Finally, mark higher timeframe structure — daily and 4H swing highs/lows, the last clean break of structure, any level that's been respected more than twice. This is your map for the session. You're not redrawing it every time price ticks.
Your daily bias in one sentence
Write it down, literally one sentence, before you look for entries: "I am bullish/bearish/neutral on [instrument] above/below [level], invalidated if price closes [above/below] [level]." If you can't fill that template in under ten seconds, you don't have a bias — you have a hunch, and hunches don't survive contact with a losing streak.
Your own state: the honest two-question check
Two questions, answered honestly before you set your daily loss limit as an actual currency figure ("$400 today, done"):
- Did you sleep? Under six hours and your risk tolerance reads different by 10am than it will at 2pm — the data on sleep-deprived decision-making isn't kind to traders holding open risk.
- Are you trying to make back yesterday? If yes, cut size in half before you open a chart. Revenge trading doesn't announce itself; it just shows up as a bigger lot size than your plan called for.
Last item: review open positions for correlation risk. Long XAUUSD and short DXY isn't two trades — it's one trade wearing two tickets, because gold and the dollar index move as near-mirrors most sessions. Stack them both at full size and you've doubled your real exposure while your position sheet says you're diversified. Check correlated pairs before you add anything new, not after the drawdown shows you the connection you missed.
Phase 2: Trading Entry Criteria — What a Valid Entry Actually Is
A valid entry exists only when four things are true at once: the condition is met, the setup has formed, the trigger has printed, and you know your invalidation level before you click buy or sell. Miss one and you don't have a trade entry — you have a guess with a chart attached.
The CSTI model: Condition, Setup, Trigger, Invalidation
Most trading entry criteria fail because traders blend these four layers into one fuzzy feeling. The CSTI model forces you to separate them:
- Condition — the market environment that must exist before you even look for a trade. Trend direction, session (London/NY overlap vs Asia chop), and whether you're inside a news blackout window.
- Setup — the pattern forming inside that condition. A pullback to a prior level, a range compressing before a break, a failed breakout reversing.
- Trigger — the single observable event that actually puts you in. A closed candle, a broken level with volume, a confirmed rejection wick. Not a feeling — a printed bar.
- Invalidation — the exact price that proves your idea wrong. This is your stop's logical home, not an afterthought you add after entry.
Trigger vs confirmation vs invalidation
This is where most entry checklists get sloppy. A trigger is binary — present or absent. "Price is approaching the trigger" is not a trigger; it's a setup still forming. Confirmation is often used loosely as a synonym for trigger, but treat it as the trigger's supporting evidence — volume, a second timeframe agreeing, momentum divergence resolving. Invalidation is the opposite pole: the price where your whole thesis is dead, not where you feel uncomfortable. If you can't state your invalidation level out loud before entry, you don't have a setup — you have a hope.
Worked example: XAUUSD pullback into structure
Condition: XAUUSD trending up on the 4H, price above the 50 EMA, no FOMC or NFP inside 30 minutes. Setup: price pulls back into a prior daily level that acted as resistance last week, now acting as support. Trigger: a bullish engulfing candle closes on the 15-minute chart, fully swallowing the prior red candle's range. Invalidation: the low of that engulfing candle, with your stop placed 1.5× ATR below it — not at the round number, because the round number gets hit first by everyone else's stop cluster. Entry only fires on the close, never on the wick touching the level.
Worked example: US100 opening-range break
Condition: US100 (NSDQ) inside the first 30 minutes of the New York cash open, overall daily bias bullish. Setup: price builds a tight opening range, compressing against the high of that range. Trigger: a 5-minute candle closes above the opening-range high with volume confirmation above 150% of the 20-period average volume — without that volume threshold, it's a breakout attempt, not a valid trigger. Invalidation: back inside the opening range, stop placed just below the range midpoint.
Copy-paste entry checklist
- Trigger is present — printed and closed, not approaching
- R:R is 2:1 or better before entry
- Stop sits at structure (swing low/high, ATR multiple) — never a round number
- Target is defined at a specific level, not "let it run"
- Position size is calculated off account risk %, not gut feel
- Invalidation level stated out loud before the order goes in
Is There Such a Thing as a Perfect Entry?
No — and chasing one is what breaks most trading checklists before they ever get tested. A perfect trade isn't the one that fills at the exact wick low with zero slippage. It's the one where every line on your checklist passed and the P&L was irrelevant to the grade.
Perfect entry vs repeatable entry
"Perfect entry trading" is a search term, not a strategy. The traders chasing the exact turn are optimizing for a moment that's only visible in hindsight. The traders who last are optimizing for a repeatable entry setup — same trigger, same R:R filter, same stop logic, run the same way on trade #1 and trade #4,000. One of these scales. The other requires you to predict the unpredictable, trade after trade, forever.
What chasing the exact turn actually costs
Run the math on gold. Waiting an extra 20–30 pips for "confirmation" past your structure level costs you a slightly wider stop — cheap, in isolation. But that's not the real cost. The real cost is the trades you skip entirely because price never gave you the exact fill you wanted, followed by the chasing entry you take an hour later at a worse price, with a wider stop, into a move that's already extended. That chased entry usually has a worse R:R than the one you skipped, and it's the one most likely to tag your stop on ordinary noise. Perfectionism doesn't reduce risk — it just relocates it to a worse entry, later, with less room.
Slippage on a well-planned entry is a rounding error. Slippage on a chased entry, taken emotionally after you missed "the" fill, is where accounts actually bleed.
The perfect trade checklist test
Here's the reframe that matters: grade the trade on process, not outcome. A losing trade that passed all eight lines of your entry checklist is an A. A winning trade taken without a valid trigger is an F — the market bailed you out, the checklist didn't, and next time it won't.
- A-grade trade: trigger closed, R:R ≥ 2:1, stop at structure, size calculated off account risk — and it still lost. Correct process, normal variance.
- F-grade trade: no confirmed trigger, size guessed, stop moved after entry — and it still won. Wrong process, lucky outcome.
This is process over outcome in practice, not theory. Run this grading habit for twenty trades and you'll see it fast: your checklist compliance predicts your long-run edge far better than any single trade's result does. The perfect trade checklist isn't the one that finds the exact turn — it's the one that makes the outcome of any single trade irrelevant to whether you did your job right.
Phase 3: The Exit Checklist While the Trade Is Live
Once you're in, there are exactly four reasons to close a trade: target reached, invalidation met, a high-impact news event inside your 30-minute buffer, or your trailing stop got hit. That's the whole trade exit checklist. Everything else — "it feels heavy," "I don't like this candle," "let me just watch a bit longer" — is a feeling, not an exit strategy, and feelings are how a 2R winner turns into a scratch.
The four exit conditions
- Target reached — price hit the level you defined before entry. You don't renegotiate it because momentum "looks strong." That's how a planned 2:1 R:R quietly becomes a breakeven trade.
- Invalidation met — your stop-loss level, the price point that proves your original thesis wrong. If it's hit, you're out, full stop, no averaging down.
- High-impact news inside the buffer — NFP, FOMC, CPI, or any red-folder event landing inside your 30-minute window. Spreads widen, slippage spikes, and your stop distance stops meaning anything. Flatten or tighten before the print, not after.
- Trailing stop active — once price has moved 1R in your favor, your stop moves to breakeven or better and starts trailing structure. From this point, the market decides when you're done, not your nerves.
Trailing stops and partial closes
A trailing stop protects gains without capping upside — it moves up (or down, for shorts) as price moves in your favor, typically anchored to swing structure or an ATR multiple rather than a fixed pip count. Partial close, or scaling out, is different: you bank a portion of the position — commonly half — at 1R and let the rest run with a trailing stop behind it.
Be honest about the trade-off here, because most checklists gloss over it. Banking half at 1R smooths your equity curve and reduces the psychological pull to bail early — you've already locked in a win, so the rest of the trade costs you nothing to hold. But it also caps your outlier winners. The 6R or 8R trade that carries an entire evaluation phase gets clipped to a 3-4R average if you're scaling out on every position. If your edge depends on a handful of big winners doing the heavy lifting, partial-closing everything works against you. Decide which trader you are before the trade, not during it.
The one-word exit reason test
Before you close anything, name the reason in one word: target, invalidation, news, or trail. If you can't, you're not exiting — you're flinching. This single test kills more discretionary damage than any indicator ever will, because it forces the decision back onto the plan you made before you had money on the line.
Copy-paste exit checklist
- ☐ Has price reached my predefined target? → Exit (target)
- ☐ Has price hit my invalidation level? → Exit (invalidation)
- ☐ Is a high-impact news event inside my 30-minute buffer? → Exit or tighten (news)
- ☐ Has price moved 1R in my favor? → Move stop to breakeven, activate trailing stop (trail)
- ☐ Can I name my exit reason in one word? If no — do nothing.
Ready to trade funded capital?
Choose your path — Instant Accounts, One-Step or Two-Step Challenges — from just $23, with up to $300,000 in funded capital.
Choose your challengePhase 4: The Post-Trade Review and Journal Template
The trade isn't done when the position closes — it's done when you've logged it and pulled the lesson out. A post-trade review checklist is where you find the leak that's costing you money even when your setups are sound. Skip this phase and you're flying the same route every week with no black box.
Pre-trade vs post-trade risk checks
These two checks look similar but do different jobs. Pre-trade is forward-looking — it stops the loss before it happens. Post-trade is backward-looking — it finds the pattern in the losses you already took.
| Pre-trade risk check | Post-trade risk check |
|---|---|
| Position size within 1–2% risk | Rule breaks logged (moved stop, oversized, revenge entry) |
| Stop placed at invalidation, not round number | R multiple realised vs. R multiple planned |
| Correlation check across open positions | Time-of-day clustering of losses (London open? NFP hour?) |
| Daily loss limit headroom confirmed | Setup-type win rate over rolling 20 trades |
If your pre-trade checklist is clean but your R multiple realised keeps falling short of planned R:R, the leak isn't your entries — it's your exit discipline. That's a post-trade finding, and you'd never see it without the log.
The fixed journal fields
Same fields, same order, every trade. A trading journal template only works if it's boring and repeatable — variety in format kills your ability to scan 50 trades in five minutes.
- Date/time and session (London, New York, Asia)
- Instrument (XAUUSD, NSDQ, EURUSD, ES futures — whatever you traded)
- Condition (trend, range, breakout, news-driven)
- Setup name (your labelled A-grade pattern)
- Trigger (the exact candle/level that fired the entry)
- Planned R:R vs. realised R
- Checklist pass/fail per line item, not just overall
- One-sentence lesson — no paragraphs, one sentence forces clarity
- Screenshot of entry and exit
Logging the trades you did not take
Most intermediate traders only journal fills. That's half the data. Log every A-grade setup that met your full checklist but that you skipped — out of hesitation, size fear, or being away from the screen. Across For Traders evaluations, this missed-trade column is consistently where traders discover their real edge leak: not bad entries, but good entries they didn't take. If your skipped A-setups would have averaged +1.8R and your taken trades average +0.9R, you don't have an entry problem — you have a conviction problem, and now you can see it in writing instead of feeling it vaguely.
The weekly review cadence
Same day, same 30 minutes, every week — Sunday evening works for most. Don't let it drift into a daily habit; you need distance from the trades to see the pattern instead of re-litigating each one. Ask three questions only:
- Where did I break my own checklist, and was it the same rule twice?
- What's my realised R multiple this week vs. my planned R:R average?
- Which A-grade setups did I skip, and what would they have paid?
Thirty minutes, three questions, one lesson per trade. That's the entire trade review system — and it's the difference between a checklist you follow and a checklist you actually learn from.
Checklist Variants by Asset Class
The four phases — pre-trade, entry, exit, review — never change. What changes is the specific line items inside each phase, because a forex trading checklist and a crypto trading checklist are solving different problems: one has sessions and news windows, the other never sleeps. Build your base checklist once, then bolt on the asset-specific delta below rather than rewriting the whole thing for every market.
Forex and gold trading checklist
The delta here is timing and volatility recalculation, not new categories. On XAUUSD specifically, ATR can nearly double around CPI or NFP compared to a quiet Tuesday — so position size gets recalculated the morning of, not assumed from yesterday's number. Add these to pre-trade:
- Check spread at the Asia-London handover — widening here has burned more accounts than any single news spike, and it's avoidable by just waiting 20 minutes.
- Pull today's ATR on XAUUSD before sizing, not last week's average.
- Confirm no red-folder release inside your 30-minute buffer (this is a fixed non-negotiable, not new).
- Note which session you're trading in — London and New York overlap carries the volume; Asia session gold often chops.
Day trading checklist (indices and intraday)
For US100 and other index intraday setups, the delta is built around the cash open. You're adding structural context that doesn't exist in 24-hour forex:
- Mark the opening range (first 15–30 minutes) before taking any signal — this defines your intraday reference, not yesterday's close alone.
- Measure the gap from prior close — a gap-and-go behaves differently than a gap-fill setup, and your entry criteria should specify which one you're trading.
- Check cash-open volume against your average — low volume on the open is a reason to sit out, not force a trade.
- Set a hard flat-by time. Index intraday traders who let positions run into the close without a plan give back more R than the ones who exit mechanically at 3:50pm ET.
Crypto futures trading checklist
Crypto never closes, which means it hands you zero natural session resets — so you have to build your own. That's the single biggest delta from forex or indices:
- Define your personal trading window (e.g., 8am–8pm your time) and treat entries outside it as exceptions requiring extra confirmation, not the norm.
- Check funding rate direction before entry — a heavily positive funding rate on a long you're about to add to is a cost dragging against your R:R every 8 hours.
- Flag weekend liquidity thinning — the weekend gap on Monday open has caught plenty of traders holding stops that never got the fill they expected.
- Check exchange maintenance windows and widen your stop-slippage assumption accordingly; thin order books during low-liquidity hours turn a normal stop into a much worse fill.
| Asset class | Added to pre-trade | Key risk this catches |
|---|---|---|
| Forex / Gold (XAUUSD) | Session timing, daily ATR recheck, spread at handover | Oversized position when volatility doubles unnoticed |
| Day trading (US100, indices) | Opening range, gap from close, cash-open volume, flat-by time | Holding an intraday trade into an unplanned close |
| Crypto futures | Defined trading window, funding rate check, weekend/maintenance liquidity | Funding cost eating R:R, stop slippage on thin books |
The Prop Firm Evaluation Layer: Three Items Retail Traders Skip
The moment your capital stops being your own — the moment you're inside a funded evaluation — your checklist grows three new lines that have nothing to do with your entry signal and everything to do with staying alive long enough to get paid. Retail traders skip these because a personal account has no daily loss limit, no maximum drawdown, no news-trading clause. A prop firm trading checklist does. Miss any one of the three below and the setup quality of your next trade is irrelevant — the account is already breached.
Daily loss limit headroom
Before you size the next trade, subtract today's open risk from the daily loss limit. If the full stop-loss on the trade in front of you would push you past 70% of that limit, the answer is no — not "size it down," no. This isn't caution for its own sake: a daily loss limit resets every 24 hours in most prop firm evaluation rules, so burning through it on a marginal setup costs you a full trading day for nothing. Treat 70% as your internal amber light, not the firm's red line — you want distance from the wall, not a photo finish with it.
Maximum drawdown buffer
Maximum drawdown is a hard floor, not a target to graze. The account is disqualified at the limit regardless of how clean the next setup looks — there's no partial credit for "it was a good trade, it just went the wrong way at the worst time." So you set a self-imposed buffer above the firm's actual number — stop trading for the day, or the week, once you're within a defined margin of it. It feels overly conservative right up until the week a correlated basket of trades moves against you at once. That buffer is the only thing standing between a bad Tuesday and a terminated account.
Firm news-window and holding rules
Check the firm's news-trading and weekend-holding restrictions before the session opens, not after you've taken the fill. Some evaluations restrict trading through NFP or FOMC; others simply widen spreads and let you find out the hard way. Weekend-holding rules matter just as much — a swing position that's fine on your personal account can violate the rules on a challenge account outright. Build this check into your pre-trade block the same way you check ATR or spread — it takes ten seconds and it's non-negotiable.
Here's the honest case for running these three checks against enforced numbers rather than self-imposed ones: a checklist only works if something holds you to it. The For Traders Two-Step Challenge and Instant Funding both hard-enforce the daily loss limit and maximum drawdown your checklist only suggests — the platform stops you before the account does the damage retail habits let slide. That's the fastest way to build the discipline this checklist demands: trade where the guardrails are real, and let the performance rewards on a funded account be the payoff for a habit you built under pressure, not in a vacuum.
Ready to trade funded capital?
Choose your path — Instant Accounts, One-Step or Two-Step Challenges — from just $23, with up to $300,000 in funded capital.
Choose your challengeFrequently Asked Questions
What is a trading checklist and what are its phases?+
A trading checklist is a written set of conditions you run through before, during, and after a trade so decisions come from your plan instead of adrenaline. Most solid checklists run four phases: pre-trade (bias, session, news), entry (condition-setup-trigger), exit (invalidation and targets), and post-trade review (journal, R multiple, what you'd change). The point isn't paperwork — it's removing the moment where FOMO or fear overrides the edge you actually tested. Traders who skip phases tend to nail entries and bleed on exits, or vice versa.
What should be on a trade entry checklist before you click the button?+
Before entry, confirm three things: the higher-timeframe bias agrees with your trade direction, price has reached a pre-marked level (not a random spot), and a trigger candle or pattern has actually closed — not just formed. Add your position size calculated off stop distance and account risk, spread/slippage check on the instrument, and a scan for red-folder news in the next 30-60 minutes. If any box is unchecked, you don't have an entry — you have a guess. Two seconds of hesitation here saves an oversized loss later.
How do you define valid entry criteria instead of just a feeling?+
Valid entry criteria are objective and repeatable — a level, a candle close, an indicator cross, or a volume spike you can point to on a chart without explaining your mood. "It felt like it was going to bounce" isn't criteria; "price tapped the daily demand zone and printed a bullish engulfing close" is. Write your criteria down before you're in front of a live chart, back-test them mentally against your last 20 trades, and refuse entries that need a story to justify them. If you can't screenshot the reason, it's not a real setup.
What does a perfect entry actually look like, and why is chasing one costly?+
A perfect entry is one where price hits your pre-marked level, confirms with your exact trigger, and your stop lands at a logical invalidation point — not the tightest possible stop. Chasing a mythical perfect fill (buying the exact low, selling the exact high) costs more than it saves, because you end up jumping in early on the offer chance it runs, or waiting for confirmation that never comes and missing the leg entirely. Good traders aim for a valid entry with a defined R:R, not a flawless one — consistency beats precision every time.
What belongs on the exit checklist while a trade is live?+
The exit checklist covers invalidation level, partial-take rules, trailing stop logic, and a hard time-stop if the setup hasn't moved within X candles. Before you're in the trade, decide where you're wrong (stop), where you're partially right (first target/breakeven move), and where you're fully right (final target or trail). Check this against news events still pending and your daily loss limit. Live in the trade, your only job is executing what you wrote down beforehand — not renegotiating with the market because price is close to your stop.
How do you run the CSTI model on a live chart?+
CSTI stands for Condition-Setup-Trigger-Invalidation, and you run it top-down before every entry. Condition confirms the market context supports your bias (trend, session, volatility); Setup marks the specific level or pattern you're watching; Trigger is the exact candle close or signal that says "now"; Invalidation is the price point that proves the idea wrong and defines your stop. Skip any letter and you either enter too early (no trigger), too late (no setup), or with no defined risk (no invalidation) — all three are how disciplined traders turn a good idea into a bad trade.
How does a forex checklist differ from day trading or crypto?+
The core CSTI structure stays the same, but the inputs change by asset. Forex checklists weight session overlaps (London/NY) and interest-rate/NFP news buffers heavily since pairs move on macro data. Day trading equities or indices like US100 leans harder on opening-range volatility and pre-market gaps. Crypto checklists add funding-rate and weekend-liquidity checks since crypto trades 24/7 with no session close to reset volatility. The instrument dictates which condition filters matter most — the discipline of running the checklist doesn't change.
What extra items does a prop firm evaluation checklist add?+
A prop firm challenge checklist adds three items retail traders often skip: daily loss limit tracking (not just per-trade risk), maximum drawdown distance from your current equity curve, and consistency/rules around news-event trading if the firm restricts it. On a Two-Step Challenge or Instant Funding account, breaching a daily loss limit ends the evaluation even if the individual trade risk was fine — so your checklist needs a running tally of the day's closed and open P/L, not just the setup quality of the next trade.
What's the difference between pre-trade and post-trade risk checks?+
Pre-trade risk checks happen before you enter — position size versus account risk percentage, correlation with open positions, and news buffer for the next hour. Post-trade risk checks happen after the trade closes — did you risk what you planned, did slippage change your actual R, and does today's cumulative loss still sit inside your daily loss limit. Pre-trade protects the next decision; post-trade protects the account and feeds your journal so patterns (like consistently oversizing on revenge trades) show up before they become a blown evaluation.
How long should running a trading checklist take?+
A well-built checklist takes 30-90 seconds to run once it's memorized — any longer and you'll miss fast-moving setups, especially on lower timeframes. The fix isn't skipping steps, it's pre-work: mark your levels and bias before the session opens so live execution only requires confirming trigger and invalidation, not rebuilding your whole thesis in real time. If a setup needs five minutes of checklist deliberation, it's usually a sign the setup itself is marginal, not that you need a faster checklist.
Written by
Lenka Rož Schánová
Operations & Risk, For Traders
Lenka focuses on the operational and risk side of running a prop trading firm — the rules behind evaluations, why drawdown limits exist, and the patterns that distinguish traders who pass from those who don't. She writes for traders who want to understand the framework they're trading inside, not just the markets they're trading.
Follow on LinkedInReady to trade funded capital?
Choose your path — Instant Accounts, One-Step or Two-Step Challenges — from just $49, with up to $300,000 in funded capital.
Choose your challengeTrade up to $300,000
Choose challenge