Top 5 Trading Strategies for Beginners in Proprietary Trading
Identifying market trends in prop trading, step by step: a 5-point trend checklist, five rule-based strategies and a worked XAUUSD example under challenge rules.

By Marcel Hambálek · Senior Trader, For Traders
In prop trading, a market trend is confirmed when three things agree: market structure (a sequence of higher highs and higher lows, or lower lows and lower highs), a sloping moving average with price on the correct side of the 20 and 50 EMA, and ADX above 20-25 showing the move has directional strength. If the higher timeframe disagrees, you do not have a trend — you have noise inside somebody else's range.
Key takeaways
- Score a trend objectively in 30 seconds: structure, EMA slope and stack, ADX above 20-25, higher-timeframe agreement, and a clear invalidation level.
- Define the trend on the H4 or daily and execute on M15-H1 — a one-timeframe read is the fastest way to hit a daily loss limit.
- Size every trade in ATR multiples, not round numbers: a 1.5-2× ATR stop on XAUUSD sized to 0.5% risk keeps three straight losses inside most daily loss limits.
- The five strategies worth learning first, in order: trend following, breakouts, mean reversion, news trading and correlated markets.
- Mean reversion and news trading carry the highest drawdown risk under evaluation rules — they are the last two you should add, not the first.
- Run one strategy through an entire evaluation, not five — and validate the rule set on simulated capital before you pay a challenge fee.
Watch: related video
How to identify a market trend in prop trading (the 5-step checklist)
A trend is confirmed when market structure, EMA slope, and ADX all agree — and the higher timeframe doesn't contradict them. If any one of those three disagrees with the other two, you don't have a trend yet. You have noise inside somebody else's range, and trading it is how evaluations get burned in week one.
Identifying market trends in prop trading isn't a feeling — it's a checklist you run before every entry. Here's the five-step version we use, in order.
Step 1: Read structure — higher highs and higher lows, marked from swing points
Mark your last four to six swing points on the chart manually. An uptrend needs two consecutive higher highs AND two consecutive higher lows — not one or the other. A single higher high with a lower low is just a wide range, not market structure higher highs higher lows in sequence. Same logic mirrored for downtrends: lower highs, lower lows, back to back.
Step 2: Check EMA slope and stack (20 EMA, 50 EMA, 200 SMA)
Price should sit above a rising 20 EMA, which sits above a rising 50 EMA, with the 200 SMA sloping the same direction underneath. A flat 20 EMA/50 EMA 200 SMA stack with price chopping through it means you're in consolidation, not a trend — no matter how the last three candles look.
Step 3: Confirm strength with ADX above 20-25
ADX rising through 20-25 tells you the move has real directional force behind it. ADX falling from 40 back toward 20 is the opposite signal — a trend that's exhausting, even if price is still grinding higher. You want ADX climbing, not declining from a peak.
Step 4: Get higher-timeframe agreement (H4/daily defines, M15/H1 executes)
Multi-timeframe analysis isn't optional. The H4 or daily chart defines the trend; your M15 or H1 chart just times the entry inside it. If your execution chart says "buy" but the daily is rolling over into a lower high, you're fading someone else's trend — a low-probability trade in any evaluation.
Step 5: Write down what invalidates the trend before you enter
Before you click buy or sell, write the exact condition that proves you're wrong. Not a feeling — a level.
| Checklist item | Confirms trend | Invalidates trend |
|---|---|---|
| Structure | 2+ consecutive HH/HL (or LH/LL) | Prior swing low/high broken |
| EMA stack | Price above rising 20 > 50 EMA | EMAs flatten or cross |
| ADX | Rising through 20-25 | Collapses below 20 |
| Higher timeframe | H4/daily agrees with execution chart | Price closes back inside prior range |
Score all five steps before you enter. If a setup fails two or more, skip it — that's not a trend, that's a hope. Traders who survive a Two-Step Challenge tend to be the ones who treat this checklist as non-negotiable, not optional homework.
Which timeframe defines the trend when you have a daily loss limit
The timeframe you use to define a trend should be dictated by your daily loss limit, not by whichever chart looks most exciting. Read a trend on M5 during a live evaluation and you'll get whipsawed two or three times before lunch — each reversal chewing into the same daily loss limit that's supposed to protect your Two-Step Challenge. The fix isn't a better indicator. It's a bigger chart.
Why the daily loss limit changes your timeframe choice
Every prop firm evaluation, ours included, caps how much you can lose in a single session before the account is disqualified. That cap is a mechanical fact, and it should drive a mechanical decision about timeframe. M5 structure reverses direction multiple times per session — that's not a flaw in your reading, it's just what noise does. Each reversal you trade as if it were a "trend" costs you a full stop, and three of those stops can burn through a max drawdown limit that was designed to survive a full week of normal volatility. Traders who blow accounts early usually aren't wrong about direction — they're right on the wrong clock.
The two-chart rule: H4 or daily for bias, M15 to H1 for entry
Build your bias on H4 or daily — that's where market structure, the 20/50 EMA slope, and ADX actually mean something, because noise gets averaged out. Then drop to M15 or H1 purely for entry timing. This is multi-timeframe analysis in its simplest, most tradeable form: one chart tells you the direction, the other tells you when to click.
The reason this protects your daily loss limit is arithmetic, not theory. A stop sized at 1.5x ATR on M15 is small relative to your account risk — two or three of those losses still fit comfortably inside a typical daily limit, while the directional edge behind the trade still comes from the H4 read. You're taking small, cheap shots at a big, real trend instead of big, expensive shots at a small, fake one.
When intraday noise is a trend and when it is just a range
XAUUSD trend trading strategy work is a good stress test for this. Gold builds one structure during the London session and can build a completely different one once New York opens — the same calendar day, two different personalities. Read only the M15 chart and you'll swear the trend flipped; check the daily chart and you'll see price never left last week's range.
US100 (NSDQ) has its own trap: the first 30 minutes after the US cash open regularly fakes out an intraday trend read, as liquidity floods in and gets absorbed before the real move shows up. Traders chasing that opening leg on M5 are trading noise dressed up as conviction.
The rule that keeps you disciplined under risk management rules for prop traders: if your H4/daily bias and your M15/H1 execution chart genuinely disagree — not just a pullback, but structure pointing opposite ways — skip the day. No trade is better than a trade that fights your own bigger timeframe while your daily loss limit counts down.
Proprietary trading example: a full XAUUSD trade under challenge rules
Direct answer: a clean proprietary trading example ties every input — entry, ATR stop, R:R target, and position size — back to one number: what the trade costs you against your daily loss limit if it fails. Below is a fully worked XAUUSD trend-continuation trade on a $100,000 evaluation account, all figures illustrative and executed on simulated capital only.
The set-up: trend checklist score and higher-timeframe bias
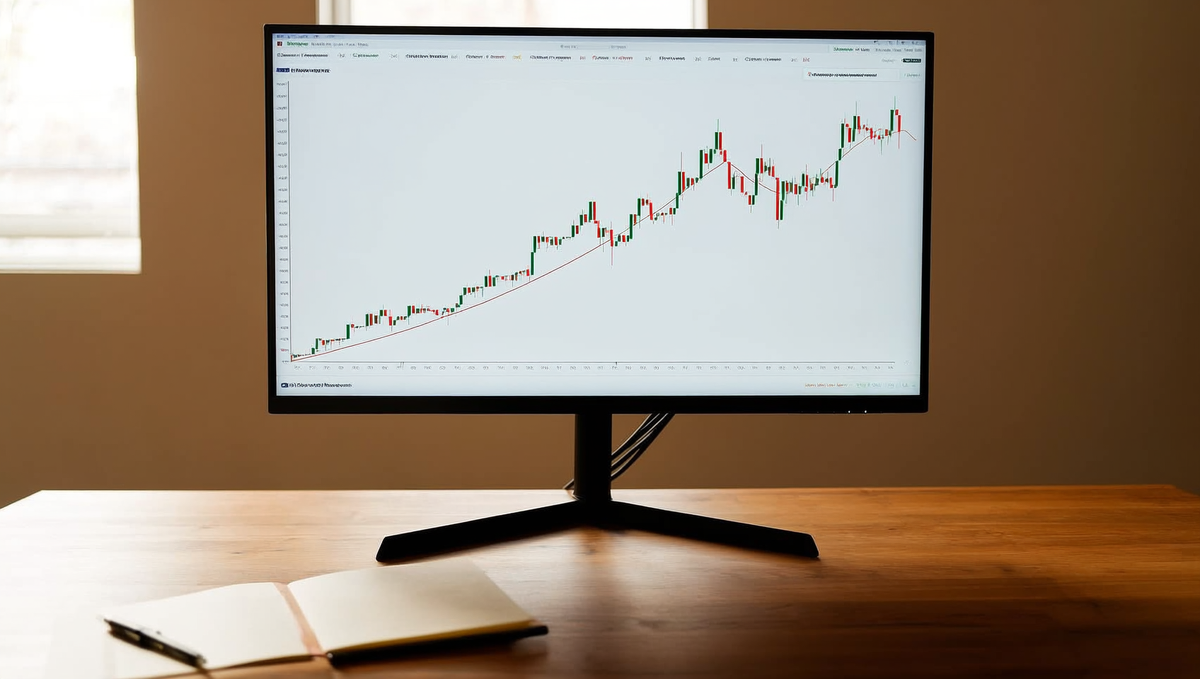
Daily structure on XAUUSD is a clean sequence of higher highs and higher lows, price trading above a rising 20 and 50 EMA, ADX(14) at 27. That's a 5/5 on the trend checklist from earlier in this guide. H4 agrees — same slope, same side of both EMAs. You're not fighting the bigger picture, so this is a trade worth sizing properly rather than skipping.
Entry trigger, stop in ATR terms and target
Price pulls back to the 20 EMA on the M15 chart at 2390.00 — your entry. ATR(14) on M15 reads 2.20. The recent swing low sits at 2385.00. Instead of parking the stop on the obvious round number, you place it at 1.5× ATR below the swing low: 2385.00 − 3.30 = 2381.70. Stop distance from entry: 8.30 points.
Target is set at 2.5R: 8.30 × 2.5 = 20.75 points above entry, giving 2410.75.
What the trade does to your daily loss limit and max drawdown
Risking 0.5% of a $100,000 account = $500 per trade. At 8.30 points of stop distance, that sizes to roughly 0.60 standard lots (100 oz per lot) on XAUUSD. If the trade hits target, reward is $500 × 2.5 = $1,250 — about 1.25% of account equity, credited as performance rewards on the funded simulation, not real-money profit.
If the trade loses, you're down $500. Against a 5% daily loss limit ($5,000 on this account size), that's 10% of the day's budget gone in one trade — nine more attempts at the same risk remain before the day locks out. Against a 10% max drawdown ($10,000), one loss is 5% of your total runway. That's the arithmetic that should decide your position size, not gut feel.
| Metric | XAUUSD trade | US100 trade |
|---|---|---|
| Entry | 2390.00 (20 EMA pullback) | Opening-range breakout |
| Stop basis | 1.5× ATR below swing low | 1× ATR below range low |
| Stop distance | 8.30 points | ~18 points |
| Target | 2.5R | 2R |
| Dollar risk (0.5%) | $500 | $500 |
| Dollar reward | $1,250 | $1,000 |
| % of daily loss limit if stopped | 10% | 10% |
| % of max drawdown if stopped | 5% | 5% |
A shorter US100 example for contrast
Same $100,000 account, same 0.5% risk. US100 breaks its opening range to the upside; you enter on the retest with a stop 1× ATR below the range low, roughly 18 points, sized so the stop again costs exactly $500. Target at 2R = $1,000. The one wrinkle indices add that gold doesn't: cash-open slippage. Your planned fill and the actual fill at the open can differ by several points on a fast NFP or FOMC print, so the stop-in-ATR-terms math above is your baseline, not a guarantee — pad the stop slightly wider on opening-range setups if you're trading the first fifteen minutes after the bell.
The five strategies compared: win rate, R:R and drawdown behaviour
No single strategy is "best" in isolation — the right one depends on how your account measures max drawdown and how much runway you're given to prove it. Here's how the five core approaches typically stack up, using illustrative ranges drawn from common retail behaviour, not guaranteed outcomes.
| Strategy | Typical win rate | Typical R:R | Best instrument | Time commitment | Drawdown risk under eval rules |
|---|---|---|---|---|---|
| Trend following | 35-45% | 1:2.5 to 1:4 | XAUUSD, NSDQ100 | Low (few trades/week) | Low — losses are small, capped early |
| Breakout | 40-50% | 1:1.5 to 1:3 | US indices, futures | Medium (session-dependent) | Medium — false breaks cluster losses |
| Pullback/retracement | 50-60% | 1:1.5 to 1:2 | Gold, forex majors | Medium-high (needs monitoring) | Medium |
| Mean reversion | 65-75% | 1:0.5 to 1:1 | Range-bound FX pairs | High (many small trades) | High — tail losses can wipe several wins |
| Scalping | 55-65% | 1:0.7 to 1:1.2 | Futures, crypto | Very high (intraday, constant) | High — slippage and spread erosion |
How to read the table if you are inside an evaluation
Win rate alone tells you nothing about whether you'll clear a phase — pair it with R:R and count how many consecutive losses your daily loss limit can absorb. A 70% win-rate mean reversion system with a 1:0.6 R:R needs roughly three winners to recover one loser of outsized size; a 40% win-rate trend system needs one 3R winner to erase seven losers. Both can pass an evaluation. Only one of them survives a bad week without you staring at a breached limit.
Why high win rate is not the same as low drawdown risk
This is the trade-off beginners misread most often. Mean reversion looks safest because you're right most of the time — but the tail trade, the one time the range breaks, tends to be several times larger than your average win. Trend following feels worse day-to-day because you're wrong more often, but each loss is pre-defined and small, and the drawdown curve stays flatter over a 30-trade sample. If you're choosing a best strategy to pass a prop firm challenge, friendlier drawdown behaviour usually beats a flattering win-rate number on paper.
Best fit by product: Instant Funding vs Two-Step Challenge
Strategies with long flat periods — trend following, patient breakout setups — pair naturally with the For Traders Two-Step Challenge, where the generous time window lets you wait for the real move instead of forcing trades to hit a deadline. Strategies built on many small trades and tighter, frequently-adjusted stops fit better where drawdown is measured as trailing rather than static, which is why scalpers and mean-reversion traders often lean toward For Traders Instant Funding once they've proven the system elsewhere — no evaluation clock, but the trailing max drawdown rule punishes overtrading fast. Match the mechanics to the strategy before you match the strategy to the market.
Strategy 1: Trend following — the default for evaluation accounts
Trend following is the friendliest strategy for passing a prop firm challenge because it keeps your loss distribution small and clustered while letting winners run past 1.5R, 2R, sometimes further. This is the trend following strategy prop firm challenge takers default to first, and for good reason — it matches how daily loss limits are structured. A daily loss limit punishes frequent, uncorrelated losses far more than it punishes patience. Trend following gives you fewer trades, fewer losses, and the losses you do take are small because you're not fighting the tape.
Entry trigger: pullback to the 20 EMA in a confirmed trend
You don't chase the breakout candle. You wait. Once your trend checklist scores 4/5 or better — structure, EMA slope, ADX above 20 — you wait for price to pull back into the 20 EMA pullback zone. That's your discount entry. Confirmation comes from a rejection candle (long wick, close back in trend direction) or a momentum shift on your execution timeframe — say, 15-minute stochastic crossing back up inside an H1 uptrend. No confirmation, no trade. The EMA is a zone, not a laser line — give it a few ticks of room either side.
Stop placement and sizing in ATR multiples
Stop goes 1.5× ATR beyond the structural low or high, never parked at the obvious round number. Round numbers get hit first — everyone's stop is sitting there, and liquidity gets swept before the real move continues. On XAUUSD, where a single ATR swing can run $8-12 on the daily, sizing by ATR multiple rather than a fixed pip count keeps your risk consistent across volatility regimes instead of blowing up your R multiple on a wide-range day.
Managing the runner without breaking consistency rules
Take the first partial at 1.5R — this banks real progress toward your profit target without needing the full move to play out. Trail the remainder behind the 20 EMA or a 2× ATR trailing stop, whichever gives the trade more room on that particular instrument. On US100, which whips harder intraday than gold, the 2× ATR trail usually keeps you in longer than a tight EMA trail. The point of the trail is to let the runner pay for the small losses chop will eventually cost you — that's the whole economics of the strategy.
Where trend following fails: chop, and how to detect it early
ADX under 20 plus candle bodies overlapping each other for five or more bars — that's chop, and trend following bleeds slowly inside it. Detect it early and stand aside; don't force pullback entries into a flat 20 EMA. Be honest with yourself here too: even a well-scored trend trade has losing streaks of four, five, six in a row during transition phases, especially around FOMC or NFP when the higher timeframe hasn't picked a direction yet. That's not a broken system — it's the tax you pay for the outsized winners on the other side. Among prop trading strategies for beginners, trend following is the one that rewards patience over prediction.
Ready to trade funded capital?
Choose your path — Instant Accounts, One-Step or Two-Step Challenges — from just $23, with up to $300,000 in funded capital.
Choose your challengeStrategy 2: Breakout trading — telling a real break from a fakeout
A breakout only counts when volume expands, the close holds beyond the level on your defining timeframe, and price either retests the level or continues the impulse without hesitation. Miss any one of those three confirmations and you're not trading a breakout trading strategy for funded accounts — you're donating your daily loss limit to whoever engineered the fakeout.
The three confirmations: volume/VWMA, time-based close and retest
Confirmation one: the breaking candle needs volume — or VWMA slope, if your instrument doesn't print reliable volume — visibly expanded relative to the prior 20 bars. A break on shrinking volume is a warning sign, not a signal. Confirmation two: you need a time-based close beyond the support and resistance level on the timeframe you're trading, not a wick poking through and snapping back. A 15-minute breakout needs a 15-minute close, full stop. Confirmation three is your entry method: either the retest of the broken level, or continuation on the back of the impulse leg. The retest costs you fills — price sometimes never comes back, and you watch the move go without you. Continuation entries cost you stops — you're chasing into a level that can still reject. Neither is wrong; know which trade-off you're accepting before you click.
Entry, stop and target for a funded-account breakout
Your stop goes 1× ATR back inside the broken level — not tucked just under the level itself. Fakeouts exist specifically to sweep the obvious stop cluster sitting right at the line, grab liquidity, and reverse. Give yourself the ATR buffer and you survive the sweep that stops out everyone who placed their stop at the round number. Target the measured move of the prior range, or scale at 1.5R and trail the rest behind VWAP or VWMA once momentum confirms.
The false breakout filter that saves your daily loss limit
Session opens — London for gold, the US100 cash open — produce both the cleanest breaks and the nastiest fakeouts, because that's when real institutional volume and pure liquidity-hunting algos operate in the same five-minute window. The rule: if a level breaks in the first five minutes of a session without volume confirmation, stand down. Let it retest or fail. Across For Traders evaluations, the false breakout fakeout during that opening window is one of the most repeated ways traders blow a daily loss limit in a single trade — chasing the first candle instead of waiting for the close.
Strategy 3: Mean reversion — when it works and when it ends an evaluation
Mean reversion works because price stretches away from fair value and snaps back — but only inside a range. The direct answer: trade mean reversion with the trend as your filter, half your normal risk, and a hard exit rule, or it will eventually catch a move that doesn't come back. That's the single biggest way this strategy ends a challenge early.
The regime filter: 200-day MA before any oversold signal
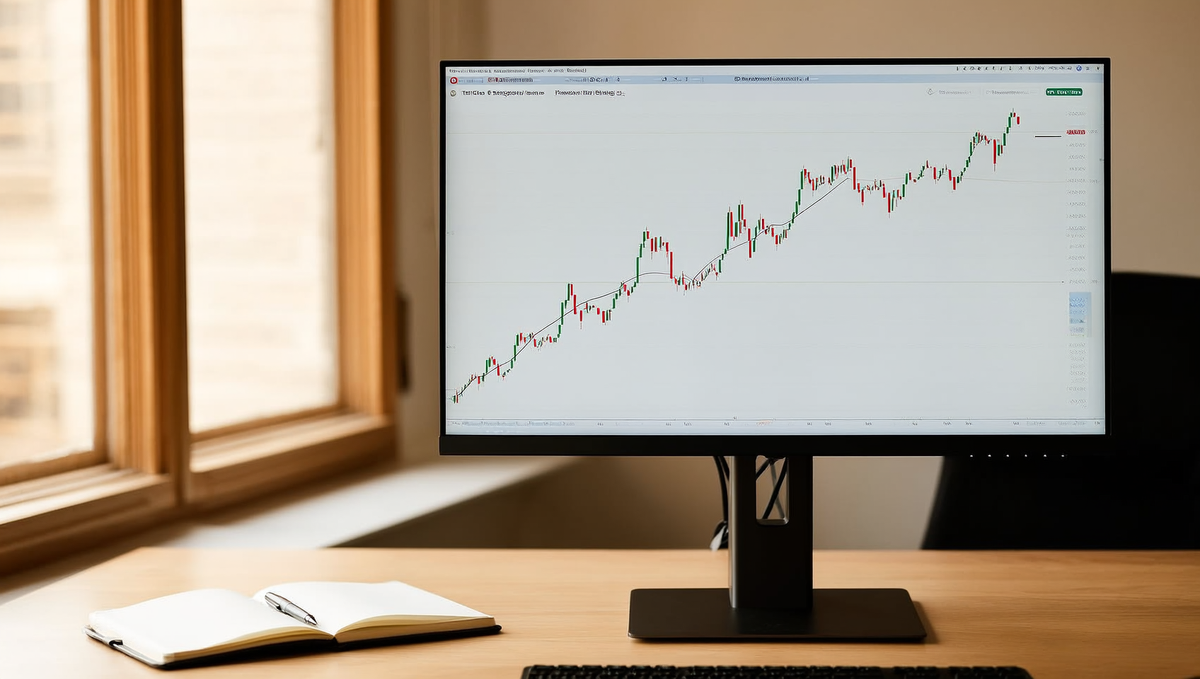
Rule one, non-negotiable: only take longs when price is above the 200-day moving average, only consider shorts when price is below it. The 200-day moving average filter tells you what regime you're in before you ever look at an oscillator. A mean reversion trading strategy example that ignores this — buying every RSI dip regardless of the higher timeframe structure — is catching a falling knife with a max drawdown attached. The filter costs you a few entries at the edges. It saves you from the one that keeps going.
Entry on 10-period RSI below 30, exit above RSI 40
Once the regime filter agrees, entry triggers on a close of the 10-period RSI below 30 — faster and noisier than the RSI 14-period, which is why it pairs better with a tight time stop. Exit above RSI 40, not 50 or 70 — you're not calling a reversal, you're fading a stretch. Add a hard time stop: if RSI hasn't recovered above 40 within a set number of bars (we use roughly 8-10 on intraday setups), you exit regardless of price. The trade thesis is "snap back soon," not "eventually." If it doesn't snap back soon, you're wrong, not early.
The blow-up scenario: mean reversion into a trend or a news release
Size this at roughly half the risk you'd use on a trend trade, stop at 2× ATR. Mean-reversion losers aren't small losers — they're the ones that keep going while you keep telling yourself it has to bounce. There are two specific ways this blows an evaluation:
- Averaging into a genuine trend day. US100 gaps down, RSI hits 25, you buy — then it keeps trending because it wasn't a stretch, it was a regime change. Averaging in doubles the position right as the market tells you you're wrong.
- Holding an oversold signal into an NFP or FOMC print. RSI below 30 heading into a scheduled release isn't a setup, it's a coin flip with leverage. The bounce you're waiting for can turn into a one-directional leg that blows through your 2× ATR stop on the fill.
Be honest about the trade-off: mean reversion typically runs a higher win rate than trend-following, but the tail losses are what erase the daily loss limit and the account. You're not avoiding the losses — you're sizing and time-stopping so they stay small enough that the win rate actually pays off across a sample, not just across a lucky week.
Strategy 4: News trading — NFP, FOMC and CPI inside a challenge
News trading is viable inside an evaluation only when the size and the stance are both decided before the print, not during it. The 60 seconds after Non-Farm Payrolls or an FOMC statement is not decision-making time — it's execution time for a decision you already made hours earlier.
The economic calendar routine before every session
Before you open a chart each morning, you open the economic calendar. Mark three tiers of release: NFP (first Friday of the month), CPI (mid-month), and FOMC (eight times a year, plus the press conference 30 minutes after the statement). Know the release time in your own session — 8:30am ET for NFP and CPI, 2:00pm ET for the FOMC statement — and block a no-new-trades window around it if you're inside a daily loss limit. This isn't optional admin. It's the difference between a planned stance and an emotional one.
Three ways to trade a release: fade, follow, or flat
- Flat through the print — the default for anyone managing a max drawdown rule. You close or reduce exposure before the release and re-enter once the market has picked a direction. No prediction, no risk, no story to tell — just capital preserved for a cleaner setup an hour later.
- Follow the second leg — you let the initial spike (the algorithmic, headline-number reaction) exhaust itself, then trade the impulse that forms once real order flow digests the data. This is usually 5-15 minutes after the print, not the first candle.
- Fade the exhaustion — reserved for experienced traders only, with a wide ATR-based stop and quarter position size. You're betting the initial move overshot; if you're wrong, the stop needs room to absorb the second leg too.
Spread, slippage and why sizing happens before the print
Spread widening on XAUUSD during an FOMC statement can turn a normal 3-4 pip spread into 30-40 pips for a few seconds. A 1.5× ATR stop calculated on pre-release volatility can fill three times wider than intended — your risk model assumed a spread that no longer exists. This is why position sizing happens before the release, calculated off the average pre-news ATR, never adjusted live. If you can't size it in advance, you shouldn't be in the trade.
Which instruments react to which prints
| Instrument | Most sensitive to | Typical reaction window |
|---|---|---|
| XAUUSD | CPI, FOMC statement | Immediate spike, second leg 5-15 min later |
| DXY | CPI, FOMC guidance | Correlates inversely with gold's second leg |
| US100 | Rate expectations, forward guidance | Slower build, often peaks at press conference |
| USD pairs (EURUSD, GBPUSD) | NFP | Sharp first-minute spike, frequent retrace |
None of these reactions are guesswork — they're patterns visible across enough releases to plan around. Trade the plan, not the headline.
Strategy 5: Correlated markets — trading gold, DXY, oil and indices together
A market correlation trading strategy works when you use one instrument to confirm another, not when you use it to double your position size without noticing. XAUUSD, DXY, USD/CAD, crude oil and US100 all move on shared macro inputs — rate expectations, risk sentiment, dollar flows — and if you're trading multi-asset without watching how they line up, you're leaving confirmation (and warning signs) on the table.
The core pairs: gold vs DXY, USD/CAD vs oil, indices vs yields
Three relationships belong on your screen permanently:
- XAUUSD gold vs DXY — the classic inverse. Gold is priced in dollars, so a weakening dollar index mechanically supports gold, and a strong DXY breakout usually caps gold rallies. When both move the same direction for more than a session, something's off — pay attention.
- USD/CAD oil correlation — Canada is a crude exporter, so USD/CAD tends to fall as WTI rises and vice versa. This isn't superstition; it shows up in CME futures order flow around inventory data and OPEC headlines. A CAD move with no matching oil move is a flag, not a coincidence.
- Indices vs yields — US100 is duration-sensitive tech-heavy exposure, so it leans hard against rate expectations. Rising real yields typically pressure the index; falling yields (or dovish guidance) give it room to run. It's the same logic that governs how indices reacted to the FOMC guidance in the trend-confirmation table earlier — just extended across instruments.
Using correlation as confirmation, not as a second position
Here's the discipline rule most beginners break: correlation is a filter for one trade, not a licence to open two trades that are secretly the same bet. If you go long XAUUSD and short DXY at the same time, you don't have two positions with correlated risk — you have one position at double size against your daily loss limit. Prop firms size max drawdown per account, not per idea; a correlated blow-up counts the same as an oversized single trade.
The correct use: take the gold long only if DXY is failing at resistance. That's confirmation — a second data point agreeing with your thesis before you enter, not a second entry after you've already committed.
Correlation breaks: the setups that appear when relationships fail
When a historically tight relationship decouples, one side is usually wrong — and figuring out which one is a trade in itself. USD/CAD holding firm while oil spikes hard tells you either CAD strength is coming from elsewhere (rate differential, risk-off USD demand) or the oil move is thin and won't hold. Correlations drift with macro regime changes, so re-measure them on a rolling basis — don't assume last quarter's r-value still applies.
| Pair | Normal relationship | What a break usually signals |
|---|---|---|
| XAUUSD / DXY | Inverse | Safe-haven flow overriding dollar strength |
| USD/CAD / Crude oil | Inverse | Rate differential or risk sentiment dominating oil-linked flow |
| US100 / Yields | Inverse | Earnings-driven move decoupled from rate path |
Ready to trade funded capital?
Choose your path — Instant Accounts, One-Step or Two-Step Challenges — from just $23, with up to $300,000 in funded capital.
Choose your challengeFrequently Asked Questions
How do you identify a market trend in prop trading?+
You identify a trend by combining price structure with objective filters, not just eyeballing higher highs and higher lows. Use a moving average (like the 50 and 200 EMA) for directional bias, ADX above 20-25 to confirm trend strength, and higher timeframe structure to avoid trading noise. On XAUUSD or US100, wait for a pullback that respects the trend rather than chasing the first breakout candle. Combining two confirmations — structure plus momentum — cuts false signals significantly compared to relying on candle shapes alone.
What timeframe should you use to define trend in a challenge?+
The 4-hour or daily chart should define your trend bias, while the 15-minute or 1-hour chart handles entries — this keeps you aligned with the bigger move without overtrading against your daily loss limit. Lower timeframes generate more signals but also more noise, which burns through your daily loss limit fast during a Two-Step Challenge or Three-Step Challenge. Trading with the higher timeframe trend also means fewer, higher-quality setups, which matters when every red day counts against your evaluation.
What is a proprietary trading example from trend to exit?+
A concrete example: gold prints a higher high on the 4H chart, price pulls back to the rising 50 EMA, and ADX holds above 25 — that's your trend confirmation. You enter on a 15-minute bullish engulfing candle at the pullback zone, place your stop 1.5x ATR below the swing low (not the round number), and size the position so the stop equals no more than 1% of account risk. You take partial profit at 1:1 R:R and trail the rest behind structure, exiting fully once momentum stalls against your daily loss limit buffer.
What are the five core prop trading strategies for beginners?+
The five worth learning in order are trend following, breakout trading, mean reversion, news/event trading, and correlation-based trading. Start with trend following since it's the most forgiving for building discipline and reading structure. Layer in breakout trading once you can spot real momentum, then mean reversion for ranging markets. News trading and correlation setups (gold/DXY, oil/indices) come last — they demand more experience with volatility and risk control, especially inside a funded evaluation with fixed loss limits.
How do you spot a false breakout before entering a trade?+
A real breakout closes beyond the level with expanding volume or momentum, while a false breakout wicks through and closes back inside the range. Check that ADX is rising, not flat, and that the breakout candle's body — not just its wick — clears the level. Waiting for a retest of the broken level as new support or resistance filters out most fakeouts. On instruments like US100 or XAUUSD, false breakouts spike around low-liquidity hours, so timing the session matters as much as the pattern itself.
When does mean reversion strategy fail in a funded account?+
Mean reversion fails when a ranging market suddenly trends — usually around news events or a session shift — and price keeps extending against your fade instead of snapping back. This is exactly what blows evaluation accounts, because traders average down into a move that never reverts. It works best on low-ATR, range-bound instruments during quiet sessions, with a hard stop beyond the range boundary, not a mental one. If ADX starts climbing while you're holding a reversion trade, that's your signal to cut it, not to add.
Is trading NFP or FOMC worth it during a challenge?+
News trading around NFP, FOMC, or CPI can work, but only with reduced size and a pre-planned stop — spread widening and slippage during these releases can trigger your daily loss limit in seconds. Many traders in a Two-Step Challenge skip the release candle entirely and trade the retracement 15-30 minutes after, once volatility settles. If you do trade the event itself, cut position size by half or more and never move your stop wider mid-trade hoping for a fill. The edge is real, but so is the drawdown risk.
How do gold, DXY, and oil correlations affect trade setups?+
Gold typically moves inverse to the US Dollar Index (DXY), and oil often correlates with commodity-linked currencies and risk sentiment in indices like US100 — understanding these links helps confirm or invalidate a setup. If XAUUSD is breaking out bullish but DXY is also rallying, that divergence often signals the breakout won't hold. These correlations shift during risk-off events, though, so treat them as confirmation tools, not standalone signals, especially when position sizing against a max drawdown limit.
How many trading strategies should a beginner run at once?+
One or two strategies, maximum, especially while working through a challenge — trying to run all five at once splits your attention and your risk budget. Master trend following first until it's mechanical, then add a second strategy like breakout trading once your win rate and R:R are consistent across at least 30-50 simulated trades. Running too many systems simultaneously makes it hard to diagnose what's actually working, and it's the fastest way to blow through a daily loss limit chasing uncorrelated setups.
How do you validate a strategy before paying a challenge fee?+
Backtest the strategy across at least 100 historical setups, then forward-test it on a free demo for several weeks before committing capital to a Challenge fee. Track win rate, average R:R, and max consecutive losses to see if the strategy's drawdown profile fits inside a typical 5-10% max drawdown rule. For Traders and similar platforms let you practice on simulated capital first, which is exactly the point — prove the edge exists before it has to survive under evaluation pressure and a live daily loss limit.
Written by
Marcel Hambálek
Senior Trader, For Traders
Marcel trades Futures and Forex day-trading setups on funded accounts and writes about the executional details most traders skip — order types, slippage, session timing, platform quirks on MT5 and NinjaTrader. Pragmatic, mechanics-first, no fluff.
Follow on LinkedInReady to trade funded capital?
Choose your path — Instant Accounts, One-Step or Two-Step Challenges — from just $49, with up to $300,000 in funded capital.
Choose your challengeTrade up to $300,000
Choose challenge